Intro to Computer Engineering
SIGCSE Workshop Studio A - Finite-State Machines
The files for today’s workshop are made available on a thumb drive. Copy all of the material under the Arduino directory into the Arduino directory on your laptop.

Introduction to Arduino
The Arduino is a (very) small computer that has dramatically fewer capabilities than the desktop or laptop machines that you have used in the past to run Java programs. For example, it doesn't have a keyboard, it doesn't have a screen, its processor is well over 100 times slower, and you might even be wondering, “what is the point?” The point is that small computers like the Arduino are priced relative to their capabilities. Want a computer for under $10? If so, the Arduino is a great choice! Its small size makes it incredibly useful for lots of jobs where it would seem overkill to use a $1500 laptop.
Assembling the Arduino Board
You will need to assemble the main components of your Arduino kit. The tutorial from SparkFun (the supplier of the hardware) is here, or you can follow the description below. Either gets you to the same place.
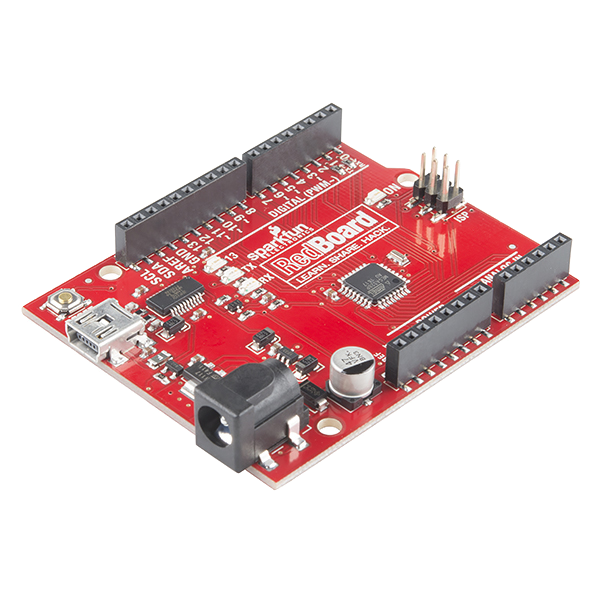
The Arduino RedBoard:
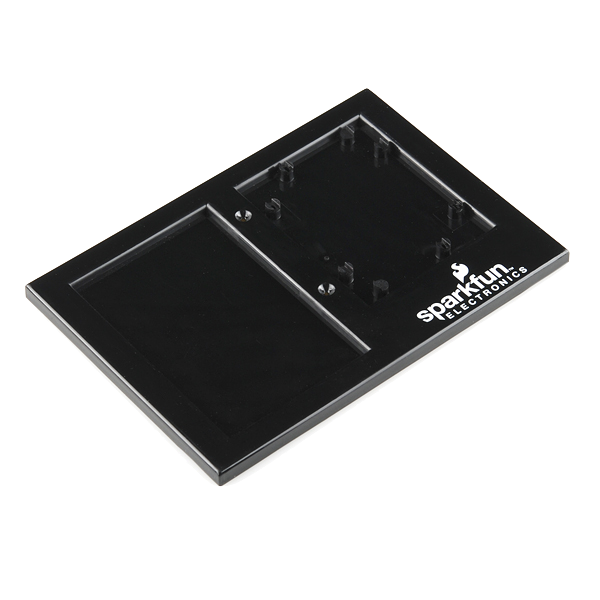
The BreadboardHolder:
And the (solderless) Breadboard:

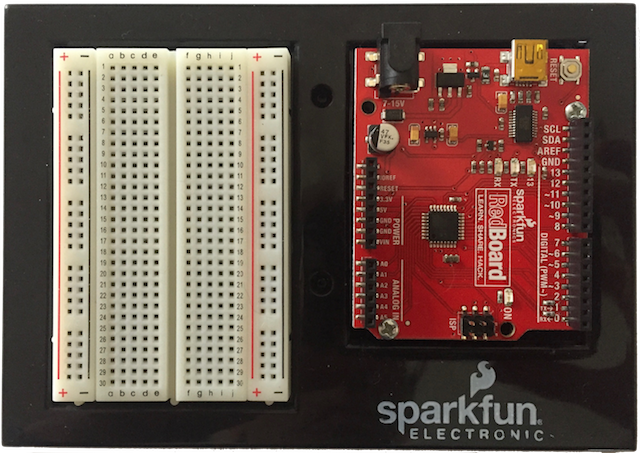
When done, it should look like:
You will need to:
-
Attach the Breadboard to the Breadboard holder with the labels on the breadboard facing the correct way, as shown above. The breadboard has an adhesive backing. Remove the protective layer and stick it to the holder in the indentation. The column letters a-j on the top and bottom of the breadboard should be in the same direction as the “sparkfun” label on the breadboard holder.
-
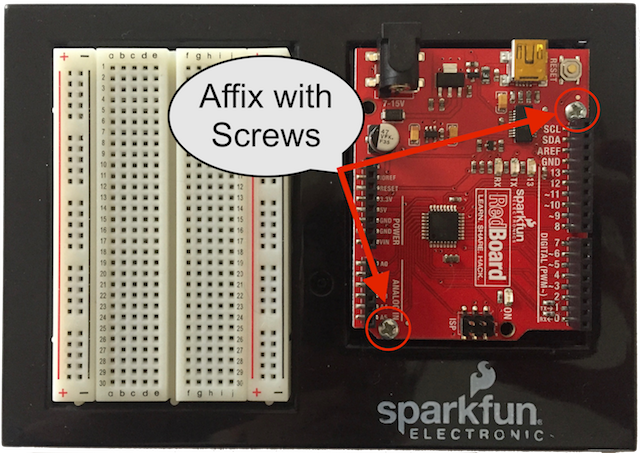
Put the RedBoard on the Breadboard Holder. Again, the print/labels should match those shown above. The Redboard has four holes for screws and the kit includes two screws. Any two holes will be suitable, but diagonal holes are recommended. Screwdrivers are available from the instructors and TAs.
Programming the Arduino
Although the Arduino itself is a computer separate from your laptop or desktop, its lack of screen serves as an impediment to programming it directly. We write and compile programs for it on a larger computer and then send them over to the Arduino via USB. The Arduino, as you’ll soon see, runs one program at a time, for as long as it’s plugged in.
As you might imagine, the transfer process is very complex, and until the Arduino came out in 2005, microprocessor programming was a long and arduous task. Luckily for us, we are past those dark ages of computing and we have the Arduino IDE (Integrated Development Environment). The Arduino IDE helps you write and compile Arduino programs and also manages uploading those programs to your Arduino board.
Arduino programs are written in a variant of C, one with extra libraries specifically for writing Arduino programs. If you have already been introduced to C, programming the Arduino should be a snap.
First Exercise
In this exercise you will get accustomed to the basics of Arduino C by observing a simple “helloworld” program and uploading it to your Arduino board.
Running a program
Navigate to the helloworld / helloworld.ino file underneath your Arduino directory. Double click on the file to start the Arduino IDE.
The helloworld.ino file is a complete Arduino program. Compiling and uploading it should help you learn the Arduino interface.
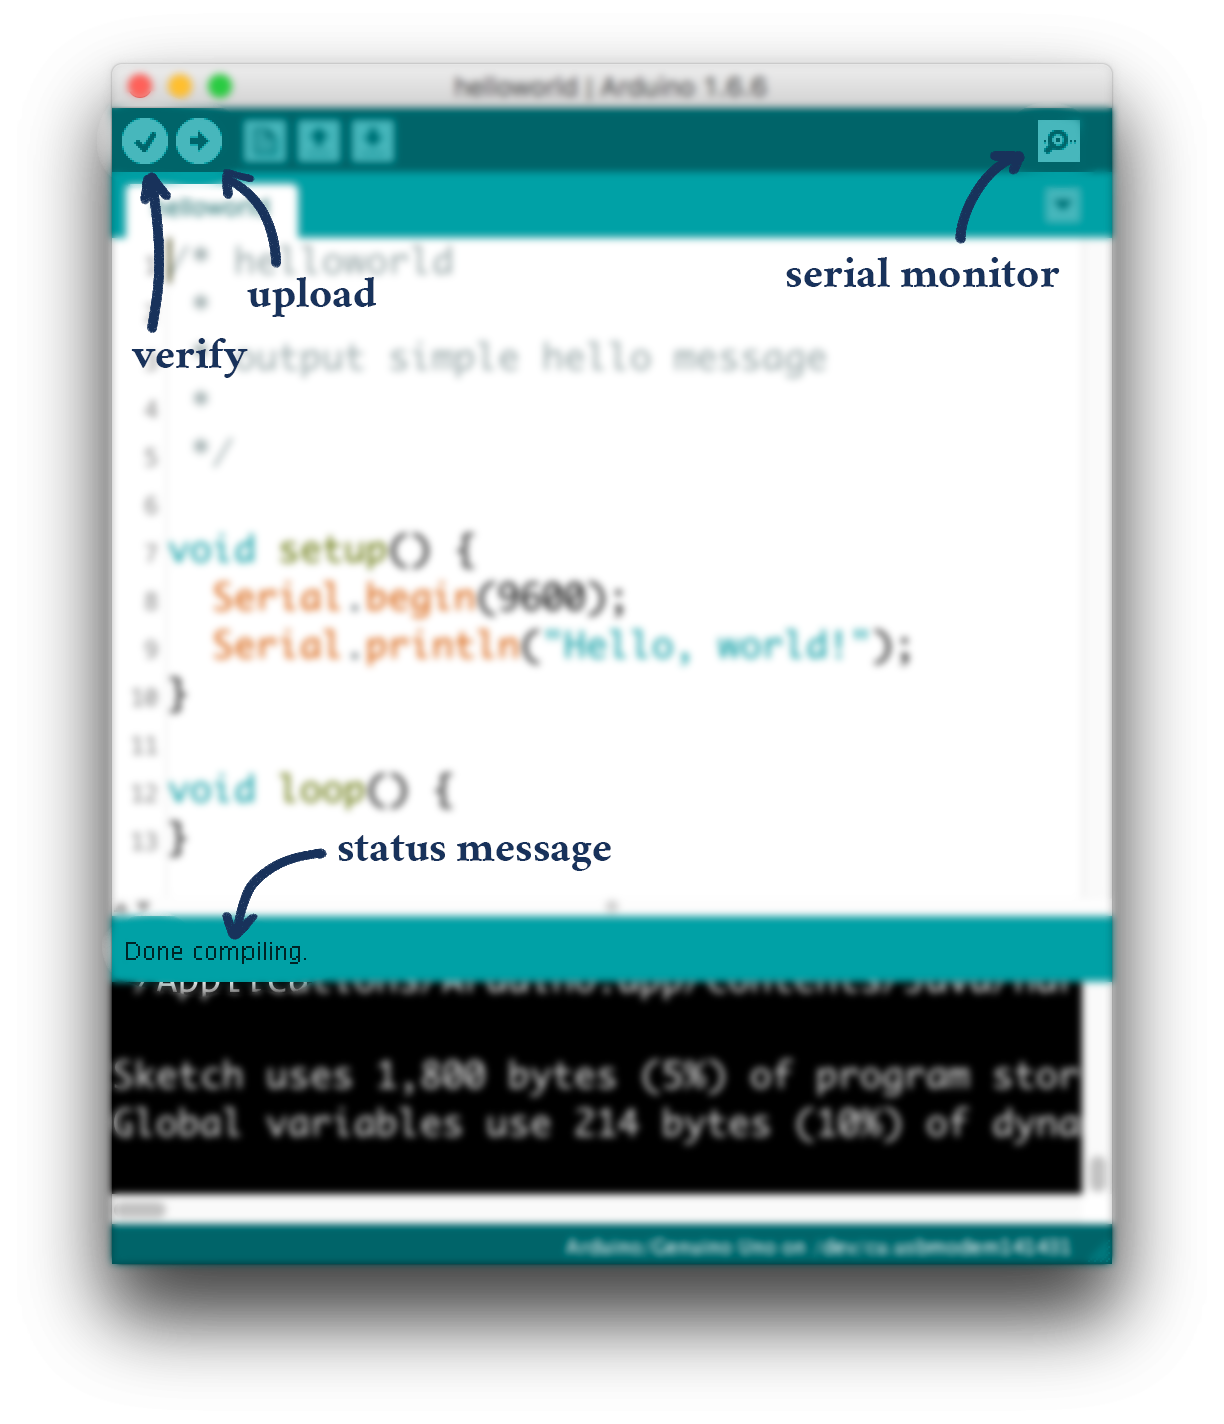
- Click the Upload button to compile
helloworldand upload it to the Arduino (the Verify button just compiles your program, looking for errors in the code). - Make sure the code uploaded correctly (the status message should say
Done uploading.). - Open the Serial Monitor to view the output that our newly programmed Arduino writes to its serial port. You should see the phrase
Hello, world!. - Press the reset button on your Arduino board. The Serial Monitor should display the phrase
Hello, world!again.
Important: Note that in the bottom right of the Serial Monitor there is a dropdown box that by default readsNewline. Change this to theNo line endingoption. This has to do with input to the Arduino from the keyboard. Although this first exercise will not provide keyboard input to the Arduino, future exercises will, and it is important that theNo line endingoption is selected or unintended issues may arise. You should get into the habit of making sure this option is selected. -
The Arduino has two entry points into your code, or, in other words, two places it looks to run your code. Whenever the Arduino starts up or is reset, the Arduino runs the
void setup()function once. After that, the Arduino runs thevoid loop()function over and over until the Arduino is unplugged or reset.Opening serial monitor or pushing the reset button on the Arduino both reset the Arduino.
Note that opening the serial monitor will sometimes print garbage data as the signals between the Arduino and computer sync up.
Problems uploading?
Considering that you are compiling a program from C, using an old USB driver designed by one company to communicate with a board designed by another company running code designed by a third, it's surprising that Arduino upload works as often as it does.
But stuff goes wrong. A lot. Here's how to troubleshoot your upload.
- Is your code free of syntax errors? Make sure that your code is correct (Verify it and make sure the status is
Done compiling.)- Are you writing to the correct port? Look under
Tools>Port>and select a different one. On Windows it will be something likeCOM3. On Mac, it will be something like/dev/cu.usbmodem1492. There's no good way to find the correct one aside from guess-and-check.- Restart the Arduino IDE and plug everything in again. It works a lot of the time.
Second Exercise
Here is a great introduction to Finite-State Machines (FSMs). They are also described in Chapter 7 of the text (read Section 7.1).
For the next exercise in this studio we have provided another program countFSM.ino, a simplified binary counter, designed to introduce you to the concepts and syntax of FSMs.
- Open
countFSM.ino(countFSM / countFSM.ino) - Upload
countFSM.inoonto the Arduino - Open the Serial Monitor and notice how the state changes with the Binary Counter
Here is a visual depiction of the FSM:

- The circles represent the possible states the machine can be in, and each circle has its own set of instructions.
In the studio example Case1 would have instructions to print out
1 : 001. - The arrows represent the possible movements the machine can make.
In the studio example the arrow from Case1 to Case2 shows that a movement from 1 to 2 is possible.
- This particular FSM can not move backward or even stay in the same state because the arrows only point forward
Enums
Here is this FSM’s enum:
enum State {
	up0,		// 0
	up1,		// 1
	up2,		// 2
	up3,		// 3
	up4,		// 4
	up5,		// 5
	up6,		// 6
	up7,		// 7
};
State counterState = up0;
What does this output?
state = up4;
Serial.print(state);
Enum types in C are just numbers with readable names, and those names are not compiled into your program – meaning “up4” is not accessible at runtime. In other languages, however, Enums sometimes have a toString() or name() method that will allow access to a name at runtime.
An Enum is useful when a variable can only take one out of a small set of possible values. Examples include Months, Game Pieces, or the Cardinal Directions.
A great way to think about these are Drop Down Selection boxes:
](selectBox.png)
There can only be one selection from Multiple Choices
enum Fruit {
	Banana,
	Apple,
	Mango
};

Fruit myFruit = Banana;

switch(myFruit) {
	case Banana:
		print("Banana Selected");
		break;
	case Apple:
		print("Apple Selected");
		break;
	case Mango:
		print("Mango Selected")
		break;
}
Switch Statements:
switch statements are where enums shine.
Here is the Switch statement from the Example:
switch(state){
	case up0:			//When state up0 , the FSM must:

		bit1 = 0;		//set the bits to match the Count
		bit2 = 0;
		bit3 = 0;

		pprint(state);

		state = up1;	//Move to the next state
					//The next loop will go to case up1

		break;			//Break to the end of the switch
					//So the next case won't run too

	case up1:			//only if counterState == up1

}
Advanced FSMs
Here is an example of an FSM that can both switch and remain in its own state depending on the Input:

- Input A : stays in own state
- Input B : switches state
Things can can get Confusing Quickly:

Third Exercise
This part has two components: drawing a FSM, and executing said FSM on your Arduino.
- Connect your Arduino
- Open
updownFSM / updownFSM.ino
Interpreting FSM bubble diagrams
Here is the drawing of the original FSM from above:
- The circles represent the possible states the machine can be in, and each circle has its own set of instructions.
- The arrows represent the possible movements the machine can make.
- Notice that this FSM has no inputs. It continuously progresses from one state to the next. This is about to change!
Drawing Your Model
- Draw a FSM to model a Binary Counter that can reverse directions
- We want to use an input to dictate when we should reverse directions. For this studio, our input will come from the keyboard. In your FSM drawing, however, you could represent the input as a binary value: 1 if a key has been pressed, and 0 if not.
- Hint – your FSM should have 16 states. One set of states is for counting up and another set for counting down. If you were to only use 8 states to represent the current number, the FSM does not know whether it should count up or down. We would need another variable to keep track of which way we are counting (which effectively adds additional states to the FSM in a rather crude and unsophisticaed way).
Transferring FSMs to code
- Return to
updownFSM.ino - Complete the function
determineNextState()with a FSM to determine the next state of the machine.- Using your FSM drawing as a guide, your FSM should have 16 states and a matching
enum.
- Using your FSM drawing as a guide, your FSM should have 16 states and a matching
Here is an Example of an Enum in Arduino C:
enum Direction {
  	 North,			// North = 0
  	 East,			// East = 1
  	 South,			// South = 2
  	 West			// West = 3
} direction = North;
- Recommended – use
switchstatements to switch between your states usingcases- Correctly designed
ifstatements will also be accepted
- Correctly designed
Here is some pseudocode to demonstrate switch:
month = 2
switch (month) {
	case 1:
		print 'January'
		break
	case 2:  		// switch to case 2 because month == 2
		print 'February'
		break		// break so other cases won't run
	case 3:
		print 'March'
		break
	...
}
Adding the Reverse Button
- Complete the function
checkReverse(), which reverses the direction of the counter if a key on the keyboard has been pressed.- To check if a key on the keyboard has been pressed, you can use Serial.read(). Take a look at the documentation to see how this function works, then use it to complete this method.
- For this lab, we don’t care which key has been pressed, we only care about whether or not any key has been pressed.
- If the user has input something,
checkReverse()should update the state to reflect this. (Be sure the serial monitor hasNo line endingselected. Other options, likeNewlinewill send one or more additional characters and may cause it to reverse multiple times.)**
The final product
Your output should look close to this:
Fourth Exercise
In this exercise, we are going to explore making the timing of our applications more precise. In the sketch countFSM.ino, remove the comments that print the time value (in the pprint() routine near the bottom of the file). The millis() library routine returns the number of milliseconds since the Arduino was reset.
Run the sketch for a bit and watch the last few digits of the time output. Is the amount of time for each loop really 1 second? Or maybe a bit longer? Next, we will introduce an approach to dealing with time that doesn’t have this problem.
Delta-based timing
Delta timing is a non-blocking timing mechanism. It does not halt the rest of the program while it waits. It’s a powerful concept used in everything from slow computers to the most recent blockbuster video games (it’s actually vital to them).
It is not a specific function, but rather a mindset, a different way of reasoning about your programs. And it all starts with millis(). millis() returns an unsigned long indicating the number of milliseconds that have elapsed since your sketch began running. Instead of having your sketch wait for the right time, you create code that will run after the appropriate amount of time has passed. By keeping track of the millis() value of the last time you executed a recurring task, you can compare its value to the current millis() value every iteration of the loop, and if the difference—the delta—is larger than a certain value, you execute the task again.
For example, if I had a task I wanted to run every second, like a heartbeat:
// Create a variable for the "period" (time between beats) in ms
const unsigned long beatPeriod = 1000;     // 1000ms = 1s.

// Create a variable to keep track of when the next beat will occur
unsigned long nextBeatTime = 0;

void loop() {

	// Get the current "time"
 	unsigned long now = millis();

 	// Check if it's been too long since the last beat
 	if( now >= nextBeatTime) {
 		// It's past time for a beat --- do it
		Serial.println("beat");

		// Schedule when the next beat should occur
 		nextBeatTime = nextBeatTime + beatPeriod;
 	}
 }
Because there’s no call to delay(), the if statement does not block program execution. If a program needs to do several tasks at regular intervals (but possibly having different frequencies), it could use one variable to keep track of when the “next beat” happens for each task.
This sketch is available as heartbeat / heartbeat.ino, if you want to run it. (We’ve actually added some additional printing so you can see its timing.)
If you have time, convert your updownFSM sketch to use delta timing. For an additional challenge, each time the state changes flash the LED (pin 13 to use the built-in LED) for 200 ms.
Generated at 2022-07-20 19:49:20 +0000.
Page written by Roger Chamberlain, Claire Heuckeroth, Ben Stolovitz, and Sean Schaffer.